Homemade Peanut Butter Cups Dark Chocolate
Highlighted under: Delightful Desserts
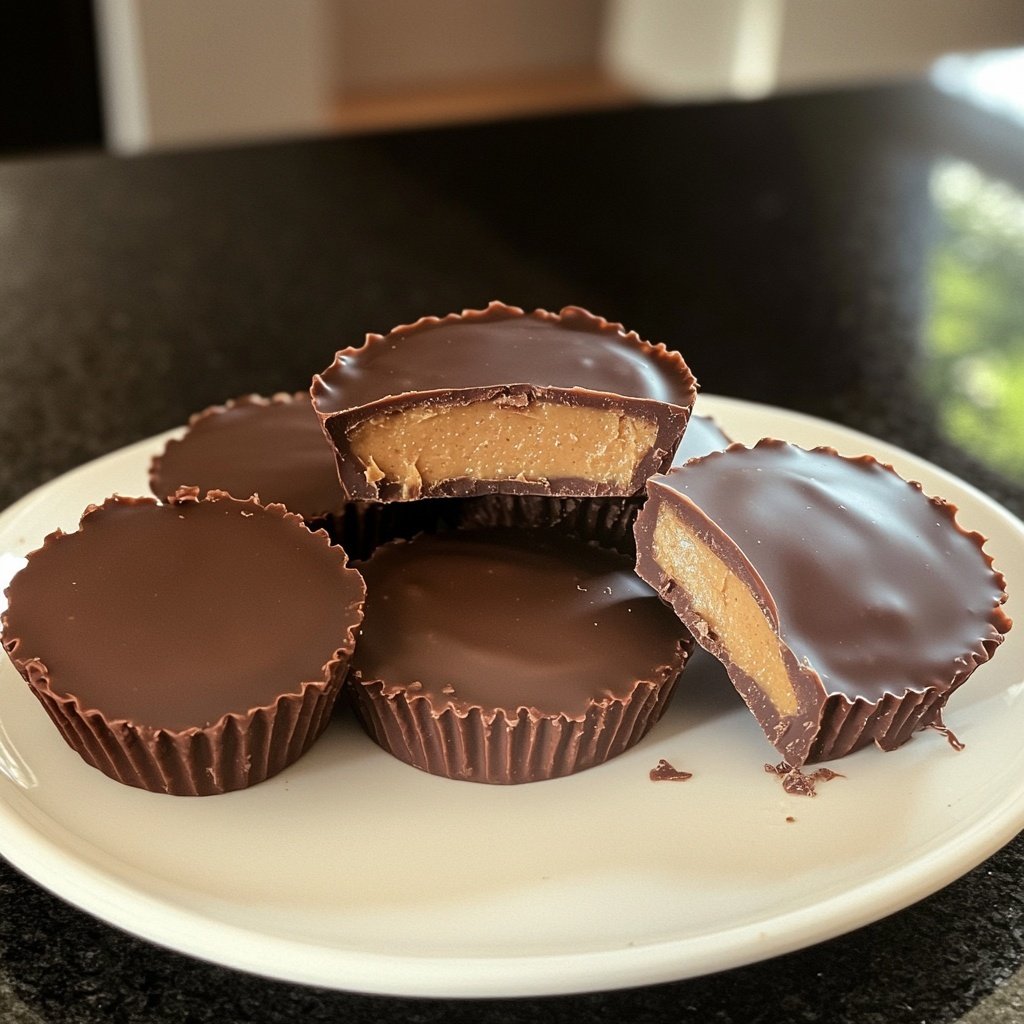
I love making homemade treats, and these Dark Chocolate Peanut Butter Cups are at the top of my list! The combination of rich, velvety dark chocolate and creamy peanut butter creates a perfect balance of flavors. Plus, making them at home means I can control the ingredients and omit any preservatives. Each bite offers a delightful experience that’s hard to resist. Whether I'm enjoying them as a late-night snack or sharing them with friends, these treats never fail to please. Try making them yourself and see how easy it is to whip up a delicious indulgence!
When I first attempted to make these homemade peanut butter cups, I was surprised at how simple the process was. I started by melting some dark chocolate and found that using high-quality chocolate made a significant difference in flavor. After mixing creamy peanut butter with a touch of powdered sugar for sweetness, I layered them into mini muffin cups. The result was a treat that was just as delightful as the store-bought version, but way more satisfying to make!
Through experimenting, I discovered that allowing the chocolate to partially set before adding the peanut butter layer prevents sinking, leading to perfectly defined layers. Not only do they taste amazing, but I also feel great knowing exactly what’s inside them – no artificial ingredients here! These peanut butter cups have become a staple in my home, loved by family and friends alike.

Why You'll Love This Recipe
- Rich chocolate flavor paired with creamy peanut butter
- Customizable sweetness based on personal preference
- Fun and easy to make for all ages
Key Techniques for Perfect Peanut Butter Cups
Getting the chocolate just right is crucial for this recipe. When melting the dark chocolate, use a microwave-safe bowl and heat in 30-second intervals to prevent scorching. Stirring between intervals ensures an even melt. If the chocolate becomes too thick, a small splash of coconut oil can help achieve a smoother consistency without altering the flavor. Aim for a glossy finish, as this indicates the chocolate is well melted and ready for use.
When spooning the melted chocolate into muffin liners, make sure to cover the base evenly. Not only does this provide a sturdy shell for your treats, but it also helps prevent the peanut butter from leaking through. I recommend using a small offset spatula or the back of a spoon to spread the chocolate across the base and up the sides of the liner. Allowing it to set slightly before adding the peanut butter filling will help maintain that visual chocolate layer.
Ingredient Insights
The choice of peanut butter plays a significant role in the final flavor and texture of your peanut butter cups. Creamy peanut butter works best for a smooth filling, but you can also use natural peanut butter for a healthier twist. Just keep in mind that natural types may have a drippier consistency; adjusting the powdered sugar slightly can help stabilize the filling. Alternatively, for those with nut allergies, sunflower seed butter can be used as a nut-free substitute. It imparts a slightly different flavor but is delicious nonetheless.
Powdered sugar is more than just a sweetener; it helps to thicken the peanut butter mixture, ensuring it holds its shape when layered. If you’re looking to reduce sugar intake, consider using a sugar alternative like erythritol or monk fruit sweetener. Just remember to taste as you go, since sweetness levels and flavors may differ from regular powdered sugar.
Serving and Storing Your Peanut Butter Cups
Once your Homemade Peanut Butter Cups are set, you can store them in an airtight container in the refrigerator for up to two weeks. If you want to keep them longer, consider freezing them. Simply lay them flat in a freezer-safe container, separating layers with parchment paper. They will maintain their flavor and texture for up to three months in the freezer. When you’re ready to indulge, allow them to thaw for a few minutes before enjoying, so they soften slightly.
These peanut butter cups can also be dressed up for special occasions! Drizzle melted chocolate or white chocolate over the top for an elegant touch, or sprinkle some flaky sea salt to elevate the flavor contrast. For a fun twist, consider adding mini chocolate chips or crushed nuts into the peanut butter layer for added texture. Experimenting with flavors can make this treat even more enjoyable!
Ingredients
Gather these simple ingredients to create your delicious homemade peanut butter cups:
Ingredients
- 250g dark chocolate, chopped
- 1 cup creamy peanut butter
- 1/4 cup powdered sugar
- 1/2 teaspoon vanilla extract
- 1/4 teaspoon salt
Make sure to have all your ingredients measured and ready to go!
Instructions
Follow these steps to make your homemade peanut butter cups:
Melt the Chocolate
In a microwave-safe bowl, melt the chopped dark chocolate in 30-second intervals, stirring between each until smooth. Be careful not to overheat.
Prepare the Muffin Cups
Line a muffin tin with mini cupcake liners. Spoon about 1 tablespoon of the melted chocolate into each liner, spreading it evenly to cover the bottom.
Make the Peanut Butter Filling
In another bowl, combine the peanut butter, powdered sugar, vanilla extract, and salt. Mix until fully combined and smooth.
Add Peanut Butter Layer
Once the chocolate has set for about 5 minutes, add about 1 tablespoon of the peanut butter mixture on top of the chocolate layer in each liner.
Top with Chocolate
Pour the remaining melted chocolate over the peanut butter layer in each liner, ensuring everything is covered.
Chill and Serve
Place the muffin tin in the refrigerator for about 20 minutes, or until the chocolate has completely set. Enjoy your homemade treats!
Store any leftovers in an airtight container in the refrigerator for the best taste.
Pro Tips
- For an extra touch, sprinkle some sea salt on top before chilling for a delightful sweet-salty contrast.
Tips for Scaling Up
If you want to make a larger batch of Peanut Butter Cups, simply double or triple the ingredients. Just ensure that you have enough muffin liners and a larger muffin tin if necessary. In this case, you may need more cooling time as several layers of chocolate can take longer to set properly. Check them after the initial chilling time and give them additional time if they’re still soft.
When scaling up, melting chocolate can become tricky due to the increased volume. Always melt it in a larger microwave-safe bowl or a double boiler setup to maintain even heat distribution. If you're using a double boiler, keep the water at a simmer to prevent the chocolate from overheating, stirring regularly until smooth.
Creative Variations
Feel free to get creative with flavor variations! Consider adding a sprinkle of cinnamon or a splash of almond extract to the peanut butter filling for a unique twist. You can also swap out the dark chocolate for milk chocolate for a sweeter profile, or use white chocolate for a fun, different taste. I personally enjoy adding a hint of crushed peppermint for festive occasions, which brightens up the standard recipe beautifully.
For an even more decadent treat, layer in additional fillings such as a thin layer of jelly or a cookie crumb base before adding the peanut butter. This could add a delightful texture contrast and a hint of different flavors that elevate the overall experience of your peanut butter cups.
Questions About Recipes
→ Can I use milk chocolate instead of dark chocolate?
Yes, you can! Milk chocolate will give a sweeter taste, while dark chocolate provides a richer flavor.
→ How long can I store these peanut butter cups?
They can be stored in an airtight container in the refrigerator for up to 2 weeks.
→ What if my peanut butter is too thick?
You can slightly warm the peanut butter in the microwave to make it easier to mix and spread.
→ Can I add toppings to my peanut butter cups?
Absolutely! You can sprinkle crushed nuts, sea salt, or even drizzle some caramel on top.
Homemade Peanut Butter Cups Dark Chocolate
Created by: Vanessa Doyle
Recipe Type: Delightful Desserts
Skill Level: Beginner
Final Quantity: 12 cups
What You'll Need
Ingredients
- 250g dark chocolate, chopped
- 1 cup creamy peanut butter
- 1/4 cup powdered sugar
- 1/2 teaspoon vanilla extract
- 1/4 teaspoon salt
How-To Steps
In a microwave-safe bowl, melt the chopped dark chocolate in 30-second intervals, stirring between each until smooth. Be careful not to overheat.
Line a muffin tin with mini cupcake liners. Spoon about 1 tablespoon of the melted chocolate into each liner, spreading it evenly to cover the bottom.
In another bowl, combine the peanut butter, powdered sugar, vanilla extract, and salt. Mix until fully combined and smooth.
Once the chocolate has set for about 5 minutes, add about 1 tablespoon of the peanut butter mixture on top of the chocolate layer in each liner.
Pour the remaining melted chocolate over the peanut butter layer in each liner, ensuring everything is covered.
Place the muffin tin in the refrigerator for about 20 minutes, or until the chocolate has completely set. Enjoy your homemade treats!
Extra Tips
- For an extra touch, sprinkle some sea salt on top before chilling for a delightful sweet-salty contrast.
Nutritional Breakdown (Per Serving)
- Calories: 180 kcal
- Total Fat: 12g
- Saturated Fat: 5g
- Cholesterol: 0mg
- Sodium: 75mg
- Total Carbohydrates: 15g
- Dietary Fiber: 1g
- Sugars: 5g
- Protein: 4g